

So you’ve seen all of the beautiful and unique holiday wreaths around your neighborhood, local shops, and Pinterest, and thought to yourself, “I can make that”. Good news! You totally can!! We’re here to walk you through the 7 easy steps that we use here at Wildly Native Flower Farm to make a Christmas wreath, and we promise it’s not too scary or hard to try at home. The most important thing to remember while making your wreath is that this is supposed to be enjoyable!! It is a very hands-on learning experience, and individually crafted to your liking – no two wreaths are the same, and everyone has their own style! So please don’t stress, have fun, and take this time to enjoy making beautiful decorations for the holiday season 😁
You can find some of our favorite wreath-making products in our Amazon affiliate store!! We do make a small commission on any purchases, and there will be a few other links scattered throughout this post.
Step One: Cut your Evergreens!
Now it’s time to get into the nitty gritty: start with cutting or gathering the greens you will be using.


- If you are cutting your own evergreens, make sure you have sharp sturdy clippers. Cut your stems around 8+ inches long depending on how wide and full you’d like to make your wreath.
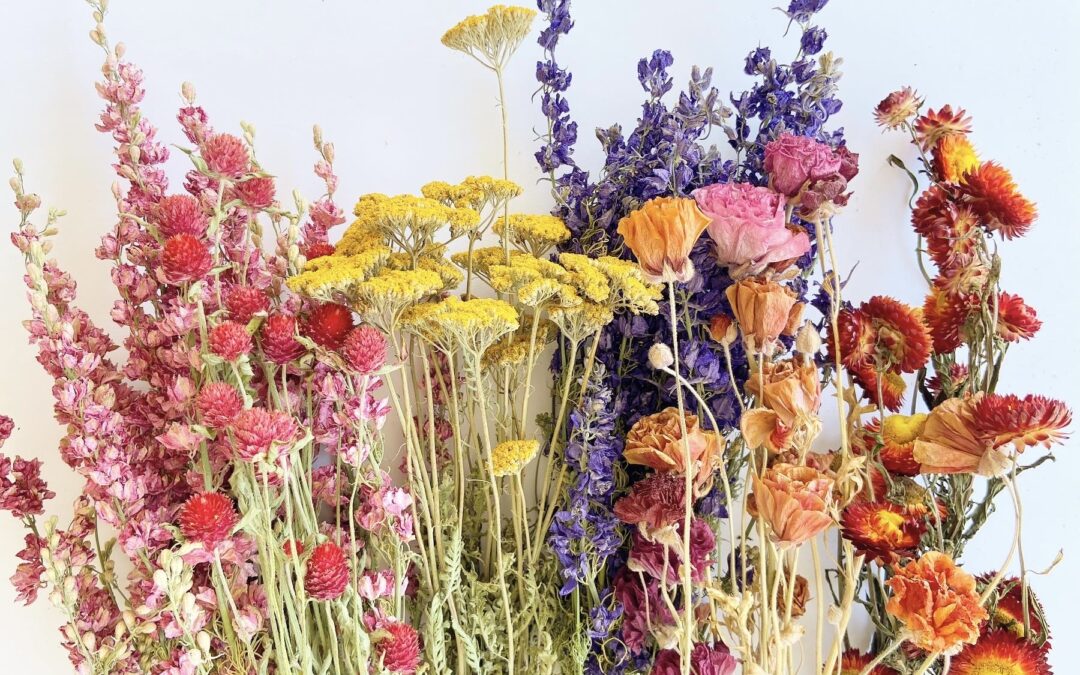
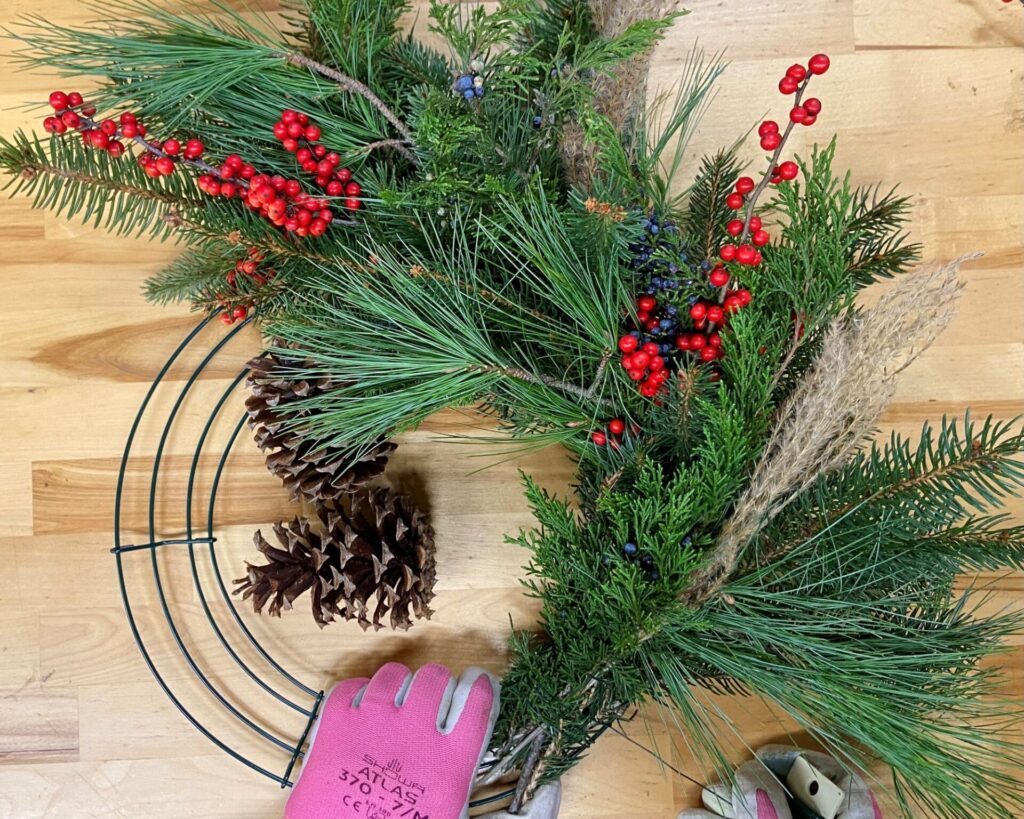
- Aim for a variety of evergreens to add texture to your wreath! Some good ones to start off with are: Fir, Pine, Cedar, Boxwood, Magnolia and Holly (if you don’t mind being poked) 😂.
- You do not have to have all of these different evergreens, the ones listed are just super common and also super beautiful in a wreath. Only having 1-3 of the evergreens listed is perfectly fine, you will still create a beautiful wreath!
Step Two: Gather the Rest of Your Supplies!
Ok, we’ve got the greens picked out! Next up is gathering the rest of your supplies. Having all of them in front of you and easily accessible will make this process so much easier.

- Wreath ring: we love using a metal ring like these
- Wire: we typically have a paddle of wire, in a heavier gauge
- Clippers: a sturdy pair of hand clippers will help cut through the evergreens!
- Evergreens: we got these covered in step one!
- Gloves: evergreens can be pokey, so protect your hands!
- Decor and Fun additions: picture the style you love, and pull together a few fun extras such as a bow, pine cones, cinnamon sticks, red berries, dried flowers, dried orange slices – whatever calls to you!! Find some ideas on our Christmas Pinterest board
Step Three: How to Attach Your Wire
Everything is laid out in front of you, but where to start to actually make a Christmas wreath? This step seems small, but it’s one of the most important as it will hold everything else in place!
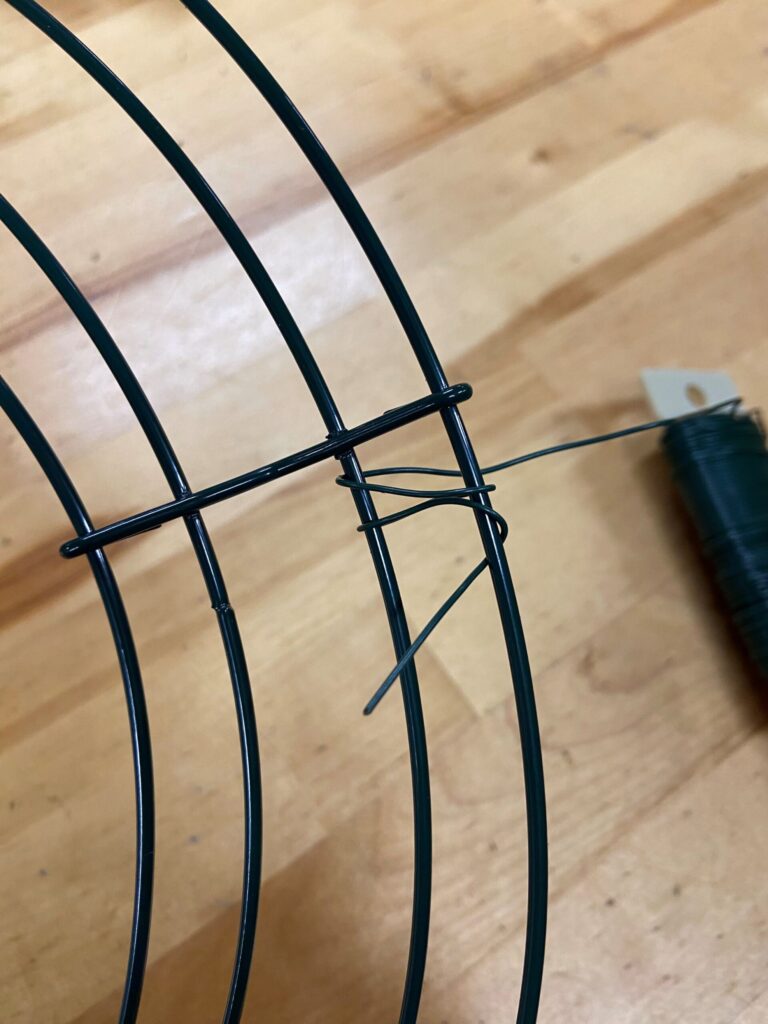

- Find the end of your wire and unspool a little bit to work with, but don’t cut it!
- Wrap the end of the wire around the outer rings multiple times to secure it.
- Then, take the short end of the wire and wrap it around the outermost ring multiple times. This is my preferred method of making sure the wire will stay strong and connected through the entire building process!
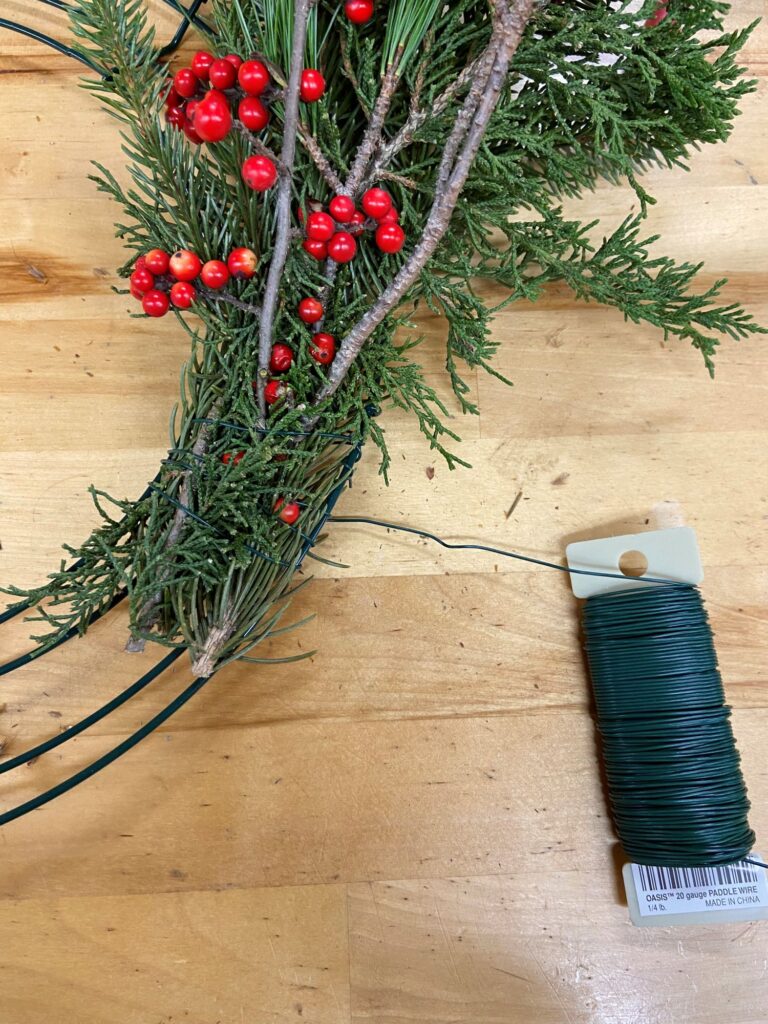
Step Four: Prep Your Evergreen Bundles
We like to prep our bundles before getting started, at least a few if not all of them! This makes it easier to grab-and-go without losing your place. Some people prefer to make their bundles in advance or as they go. That all depends on the person’s preferences and you’ll learn as you’re making the wreath!

- To build your bundles, start with your flat evergreen first (like your fir or spruce), layer on top your boxwood and/or cedar, hold it all together tightly at the bottom and boom!! You’ve made your first bundle!
- If you want red berries or dried flowers in your wreath it is easiest to add them into your bundles just like if they were a normal evergreen. This way your decor is built right in!
- When you’re building bundles, its best to have 2-3 different “recipes” to add a bunch of different textures and keep things interesting.
- Just keep repeating that process with all of your different greens alternating between the different evergreens you have picked out. It is good to keep at least one of your greens the same in every bunch to keep it consistent. Typically the green we keep as the base is the fir or spruce.
- The number of bundles you’ll need to make will depend on the size of your wreath ring, how full you’ve made each bundle, and how full you are making your wreath overall!
Step Five: Starting the Wreath!
We’ve got the supplies, the greens, the wire is attached – now how do we turn all this into the actual wreath? Read on!!
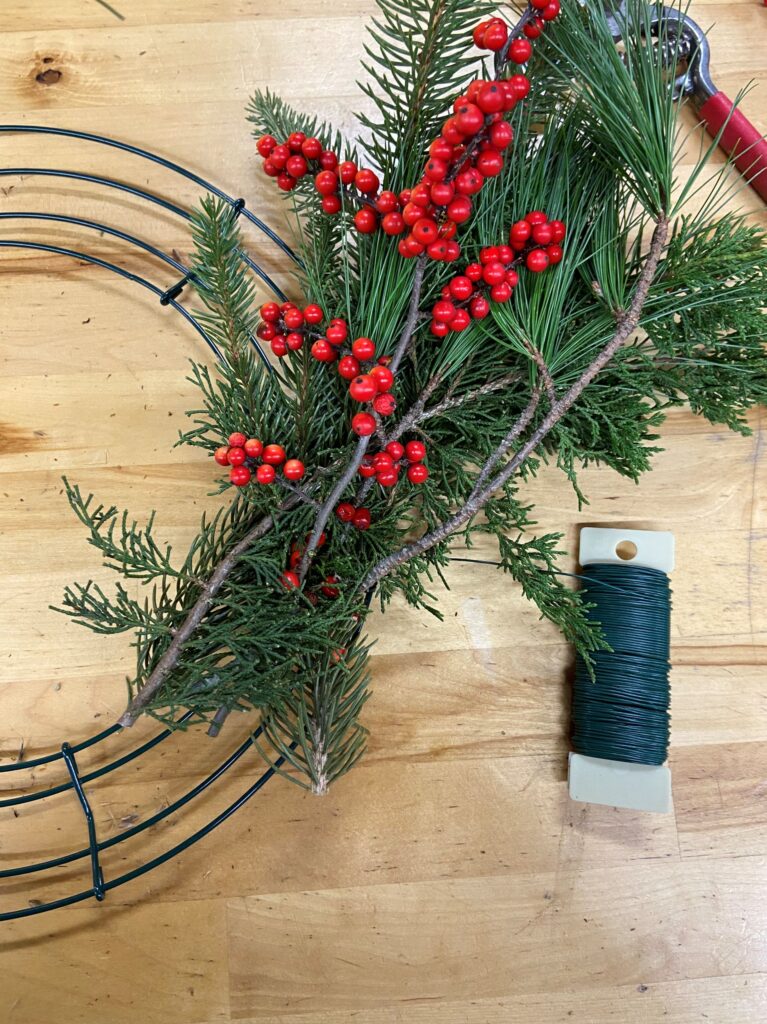
- Hold your first bundle together tightly at the base around 1-2 inches up from the bottom of your stems and cut your stems all to an even length.
- While holding your bundle, lay it in the channel on the wreath ring, and take your wire that is still connected to the spool and wrap it around all of the inner rings multiple times while pulling tightly. I personally always like doing it 3-5 times depending on how thick the bundle is!
- Take your next bundle and lay it about one-third to one-half of the way down on top of the attached bundle and wire it in place. How high up you lay it on top of your previous bundle will determine the thickness of your wreath.
- Some people prefer to work clockwise, some prefer counterclockwise!! Choose whichever way feels more comfortable for you.
- Now repeat alternating between your different bundles to create a super full and textured wreath.
- If any stems are sticking too far off the outside or inside of the ring, a quick snip will fix that!
Step Six: Adding the Last Bundle!
You’ve made it all the way around, and the finish line is in sight!! Just one more bundle to add, and of course it can be the trickiest of the bunch.


- Lift the first bundle you attached and gently shove the last bundle underneath until it looks like the gap is properly filled.
- Wire it just like all of the rest of them! If it is too difficult to get the spool under the first bundle, you can cut the wire with a bit of length on it and fish it through. If you decide to cut the wire make sure you still have plenty to go around multiple times, cut it depending on your wreath ring size.
- Super simple you can finish off the wire the exact same way you initially attached it. It will just be a little more difficult with stems in the way, so be patient with yourself!
- Now you’re finished with the base and ready for fun add-ons!
Step Seven: Finishing your Wreath!
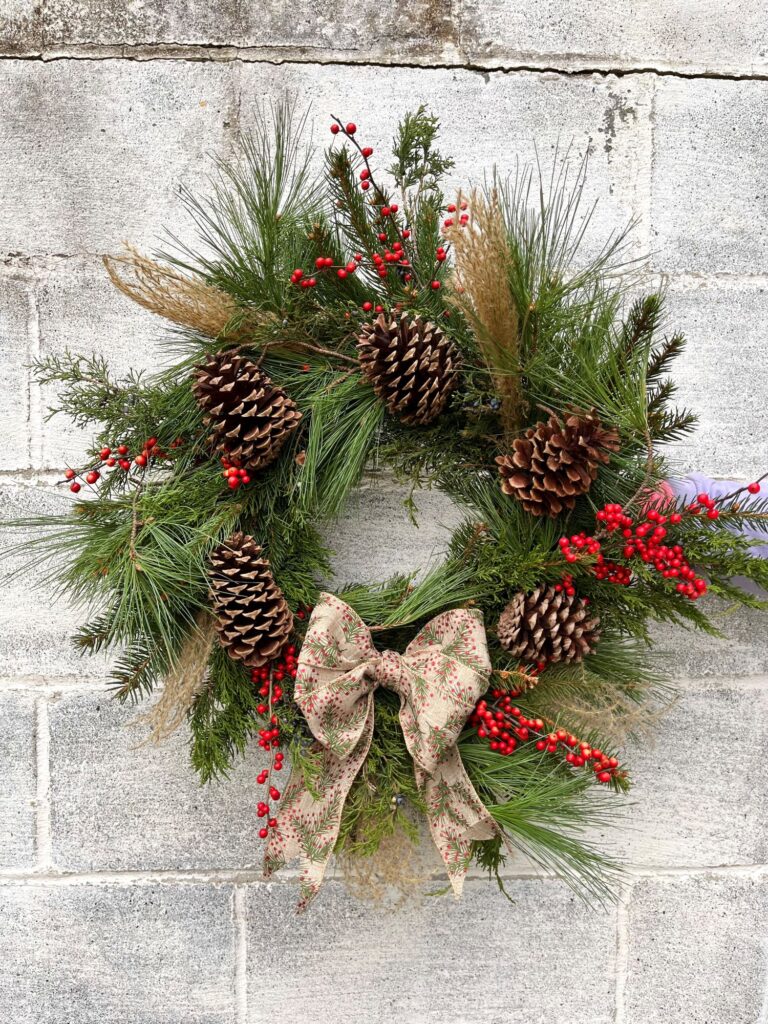
Congratulations! You’ve made it to the final stage of making a Christmas wreath! This last step will walk you through adding on any extras that were too tough to add into the bundles as you went, or anything that you might have forgotten (we all do it!).


- Some popular ideas are pine cones, cinnamon sticks, dried orange slices, feathers, dried grasses or florals, Christmas ornaments, jingle bells.. the list goes on and on!! Check out our Pinterest board for ideas!
- We’ll use pinecones as an example: cut a piece of wire about 12 inches long, wrap it around the pine cone half to one inch up from the base, and weave your wire between their scales so the wire isn’t very visible and twist the wire together a few times where it meets up.
- Next, place your pine cone on your wreath, taking the two ends of the wire each on opposite sides of an evergreen, weave them through to the bottom of the wreath so the wire isn’t visible and twist the two ends together tightly underneath. Take the twisted tail of the wire and either wrap it around a ring for extra security or tuck it up through the stems to hide it! Now repeat with however many pinecones you’d like!
Step Eight: ENJOY!!!
Technically it’s an 8 step process but this last one is easy, promise!!!
You have officially built your very own Christmas wreath, we are so proud of you!!! And we are so thankful you chose us to help teach you how to DIY a wreath. We would love to see photos of your creations so please send us a photo or tag us @wildlynativeflowerfarm on Facebook and Instagram!
Don’t have time to make your own? We’ve got you covered! We sell our own handmade creations on our shop site as well as on Etsy – and we always love taking a custom idea!
Happy Holidays, and stay cozy this winter!